Chicago-Style Bakery Apple Slices: A Classic Homemade Dessert
Chicago-Style Bakery Apple Slices are one of those nostalgic desserts that remind many people of visiting small corner bakeries where the smell of fresh pies, cookies, and pastries filled the air. This dessert has a unique charm because it combines the comforting flavors of apple pie with the convenience of sliceable bars. Perfect for family gatherings, potlucks, or holiday celebrations, Chicago-Style Apple Slices offer a buttery crust, a sweet and spiced apple filling, and a light glaze that ties everything together. In this detailed guide, we will explore not only how to make this delicious treat step by step but also its history, tips for achieving the best results, and ways to adapt the recipe for your preferences.
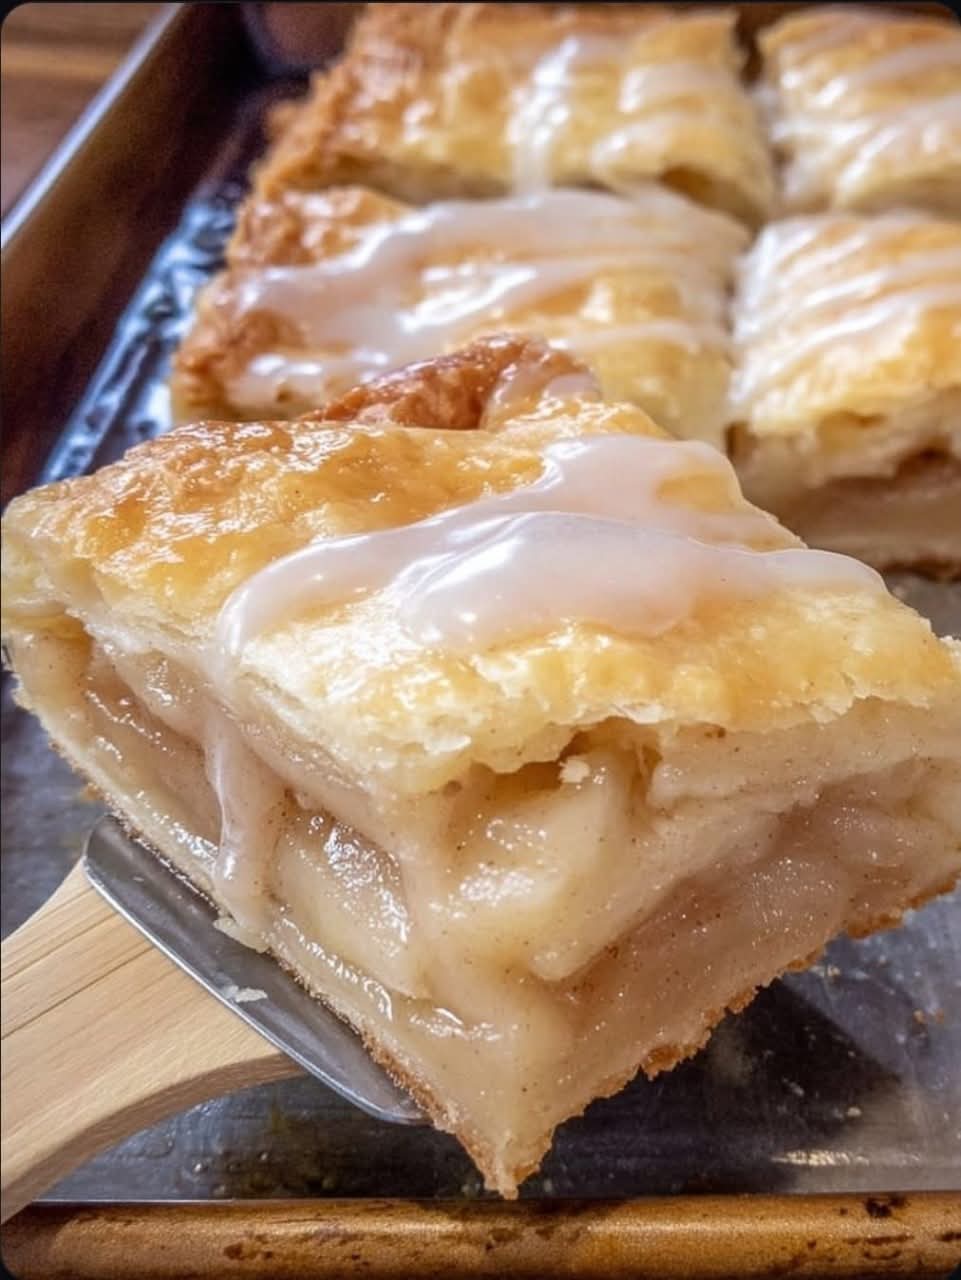
What Are Chicago-Style Bakery Apple Slices?
Chicago-style bakery apple slices are essentially apple pie bars baked in a large sheet pan. Instead of preparing a round pie, you create a rectangular dessert that can be cut into squares or slices, making it perfect for serving to a crowd. The crust is buttery and flaky, the apple filling is both sweet and slightly tart, and the glaze adds just enough sweetness to balance the flavors. Unlike traditional apple pie, which can sometimes feel heavy, this version is easier to cut, easier to serve, and has a texture that combines pastry with fruit filling in every bite.
This dessert gained popularity in the Midwest, especially in Chicago bakeries, where large sheet pans of apple slices were displayed in bakery cases. Customers could purchase a square for a quick snack or dessert, and the simplicity of the recipe made it an enduring favorite. Today, home bakers across the country continue to recreate this treat to bring back memories of old-fashioned bakeries and cozy homemade desserts.
Why You’ll Love Chicago-Style Apple Slices
One of the main reasons people fall in love with this recipe is its versatility. You can make a large batch that feeds a crowd, and the flavors are universally loved. The apples soften into a sweet and slightly spiced filling while the crust stays tender and flaky. The glaze adds that bakery-style finish that makes every square look professional and taste indulgent.
It’s also an economical dessert since apples are widely available and relatively affordable. Unlike cakes or complicated layered desserts, apple slices are straightforward to prepare, and the ingredients are pantry staples. If you’re looking for an easy apple dessert recipe that feels special without being overly complicated, this is an excellent choice.
Ingredients for Chicago-Style Apple Slices
The recipe consists of three main components: the crust, the filling, and the glaze. Each part plays a crucial role in creating the perfect balance of flavors and textures.
For the Crust:
- 3 cups all-purpose flour
- 1 tablespoon granulated sugar
- 1 teaspoon salt
- 1 cup unsalted butter, cold and cubed
- 2 large eggs
- 5 to 6 tablespoons cold water
For the Apple Filling:
- 8 cups apples, peeled, cored, and thinly sliced (about 6 to 8 apples)
- ¾ cup granulated sugar
- ¼ cup light brown sugar, packed
- 2 tablespoons all-purpose flour
- 1 teaspoon ground cinnamon
- ¼ teaspoon ground nutmeg
- 1 tablespoon lemon juice
- 1 tablespoon unsalted butter, melted
For the Glaze:
- 1 cup powdered sugar
- 2 to 3 tablespoons milk
- ½ teaspoon vanilla extract
These ingredients are easy to find and provide the foundation for a dessert that tastes far more impressive than the effort it takes to make it.
Step-by-Step Instructions for Making Chicago-Style Apple Slices
Step 1: Prepare the Crust
In a large mixing bowl, whisk together the flour, sugar, and salt. Add the cold cubed butter and cut it into the dry mixture using a pastry cutter or your fingers until the texture resembles coarse crumbs. In a separate bowl, whisk together the eggs and cold water, starting with 5 tablespoons. Gradually add this mixture to the flour and butter until a dough begins to form. If the dough feels too dry, add the additional tablespoon of water a teaspoon at a time. Divide the dough into two equal portions, wrap in plastic wrap, and refrigerate for at least 30 minutes. This chilling step is essential for creating a flaky crust.
Step 2: Preheat Oven and Prepare the Pan
Preheat your oven to 375°F (190°C). Lightly grease a 9×13-inch baking pan and set it aside.
Step 3: Prepare the Apple Filling
In a large bowl, toss the sliced apples with granulated sugar, brown sugar, flour, cinnamon, nutmeg, and lemon juice until the apples are evenly coated. The flour will help thicken the juices released during baking, while the lemon juice prevents the apples from browning and adds a hint of brightness to the filling.
Step 4: Assemble the Layers
On a lightly floured surface, roll out one portion of dough into a large rectangle and transfer it to the prepared baking pan, pressing it evenly into the bottom and up the sides. Spread the apple mixture evenly over the crust, making sure to distribute the apples in a uniform layer. Drizzle the melted butter over the apples for added richness. Roll out the second portion of dough and carefully place it over the filling. Press the edges together to seal, then cut a few small slits in the top crust to allow steam to escape.
Step 5: Bake the Apple Slices
Bake in the preheated oven for 40 to 45 minutes, or until the crust is golden brown and the filling is bubbling. If the edges begin to brown too quickly, cover them with aluminum foil to prevent burning.
Step 6: Prepare the Glaze
While the apple slices are cooling, whisk together the powdered sugar, milk, and vanilla extract in a small bowl. If the glaze is too thick, add a little more milk, one teaspoon at a time, until it reaches the desired consistency.
Step 7: Glaze and Serve
Once the apple slices have cooled slightly, drizzle the glaze evenly over the top. Allow the glaze to set for about 10 minutes before cutting into squares or slices. Serve warm for a comforting dessert or at room temperature for easier serving.
Tips for the Best Apple Slices
Use a variety of apples to balance flavor. A mix of tart apples like Granny Smith and sweet apples like Honeycrisp or Fuji will give the filling depth.
Keep your butter cold when preparing the crust to achieve the flakiest results. If your kitchen is warm, you can chill the flour in the freezer for a few minutes before mixing.
If you’re worried about a soggy bottom crust, blind bake the bottom layer for 10 minutes before adding the apple filling. This creates a barrier that helps the crust stay crisp.
Let the dessert cool before slicing to allow the filling to set. Cutting too early can cause the filling to run out.
Store leftovers in an airtight container at room temperature for up to two days or in the refrigerator for up to five days. Warm individual slices in the oven or microwave before serving for that fresh-baked taste.
Variations of Chicago-Style Apple Slices
One of the joys of baking is experimenting with flavors, and this recipe lends itself well to variations.
Apple and caramel slices: Drizzle caramel sauce over the apple filling before adding the top crust for a richer dessert.
Apple and cranberry slices: Add a cup of fresh or dried cranberries to the filling for a tart twist that pairs beautifully with the apples.
Apple and walnut slices: Mix chopped walnuts into the filling for extra crunch and a nutty flavor.
Spiced apple slices: Increase the cinnamon and nutmeg or add ground cloves and allspice for a spicier filling.
Glazed apple slices with icing sugar: Instead of a milk-based glaze, dust the cooled slices with powdered sugar for a lighter finish.
The History of Bakery Apple Slices in Chicago
The tradition of bakery apple slices in Chicago goes back to the early 20th century, when immigrant communities brought their baking traditions with them. German, Polish, and Eastern European immigrants introduced strudels, pies, and fruit-filled pastries to the region. Over time, these recipes were adapted to fit American tastes and ingredients, eventually evolving into large pan desserts like apple slices that could be easily sold in bakeries.
Chicago’s bakeries became known for their hearty, family-style desserts, and apple slices were a staple in many neighborhood shops. The dessert gained a reputation for being both affordable and satisfying, perfect for busy families looking for a quick treat. Today, it remains a beloved symbol of Chicago’s rich culinary history.
Why This Recipe Works for Modern Home Bakers
This recipe combines the timeless appeal of apple pie with the practicality of a sheet pan dessert. Modern home bakers appreciate recipes that are not only delicious but also easy to prepare and serve. With Chicago-Style Bakery Apple Slices, you don’t need special equipment or advanced skills. The dough comes together quickly, the filling is straightforward, and the glaze is foolproof. The end result is a dessert that looks beautiful, tastes indulgent, and can feed a crowd without requiring hours of work.
Serving Suggestions
While these apple slices are delightful on their own, you can elevate the experience by pairing them with complementary flavors. Serve warm slices with a scoop of vanilla ice cream for a classic combination. Add a dollop of whipped cream for a lighter touch. For a holiday presentation, sprinkle cinnamon or nutmeg over the glaze for a festive finish.
If serving at a party or potluck, cut the slices into smaller squares for bite-sized treats that are easy to enjoy without utensils. For a more formal dessert, cut larger slices and serve on individual plates with a drizzle of caramel sauce.
Healthier Adaptations
If you’re looking to make this dessert a little lighter, consider reducing the sugar in the filling by one-third or substituting honey for some of the granulated sugar. You can also use whole wheat flour for part of the crust to add fiber. Another option is to reduce the amount of glaze or use a yogurt-based glaze for a tangy twist. While the traditional recipe is indulgent, small changes can make it more suitable for everyday enjoyment.
Storing and Freezing Apple Slices
Chicago-Style Apple Slices can be stored at room temperature in an airtight container for up to two days. For longer storage, keep them in the refrigerator for up to five days. To reheat, place slices in a 300°F oven for 10 minutes or warm briefly in the microwave.
These apple slices also freeze well. Cut them into individual portions, wrap each slice tightly in plastic wrap, and place them in a freezer bag. They can be frozen for up to three months. To serve, thaw overnight in the refrigerator and warm before serving.