Description
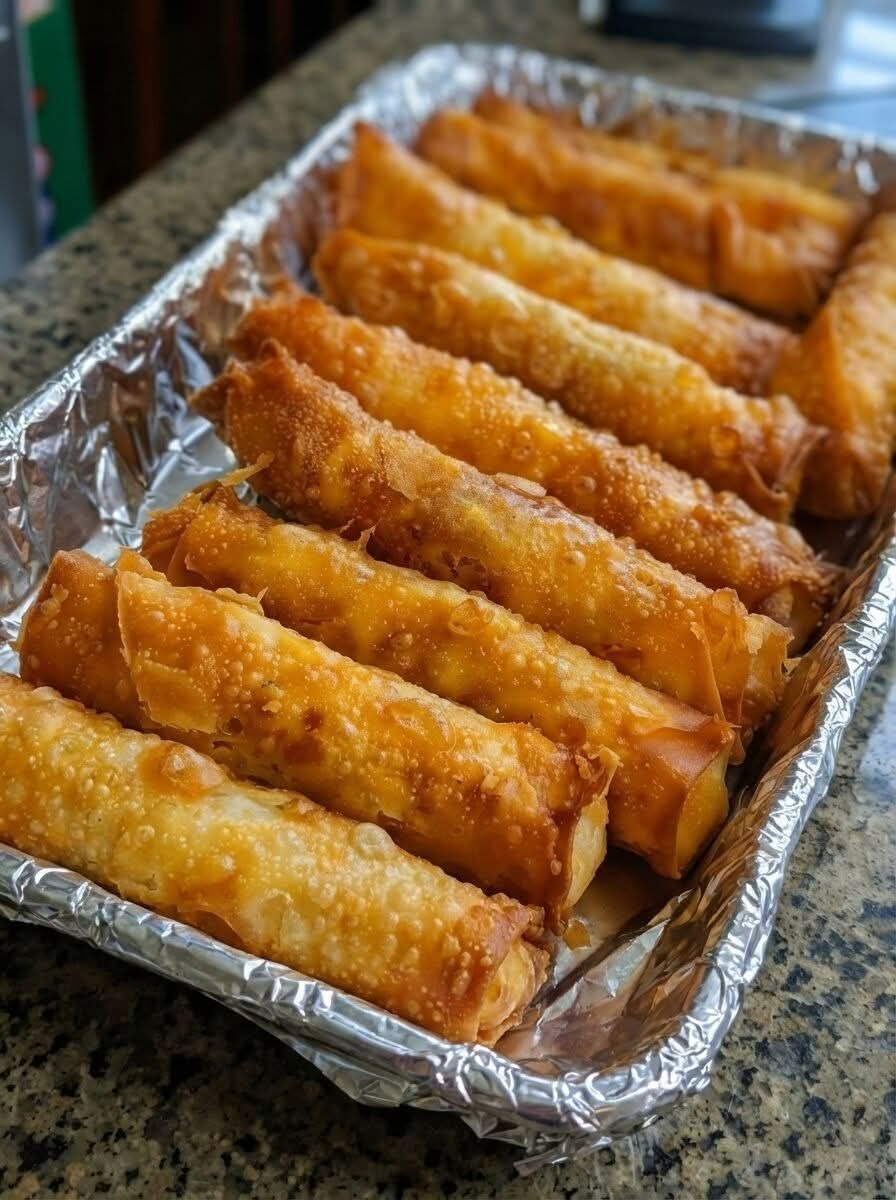
These crispy golden taquitos are perfectly crunchy on the outside with a warm, flavorful filling inside. Fried until blistered and golden, they deliver that irresistible crunch you expect from a great taquito or rolled taco. They’re simple to make, incredibly satisfying, and perfect for parties, family dinners, or snacking.
Introduction
Few foods are as universally loved as crispy taquitos. Rolled tightly, filled generously, and fried to perfection, they strike the ideal balance between crunch and comfort. This recipe focuses on achieving a crisp shell without greasiness and a filling that stays moist and flavorful. Whether served as an appetizer or a main dish, these taquitos never disappoint.
Why You’ll Love This Recipe
These taquitos fry up evenly with a bubbly, golden crust and hold their shape beautifully. They can be customized with different fillings, made ahead of time, and served with a variety of dips. Best of all, they’re made with simple ingredients and deliver restaurant-quality results at home.
Ingredients
12 small flour or corn tortillas
2 cups cooked chicken, finely shredded
1½ cups shredded cheese (cheddar, mozzarella, Monterey Jack, or a blend)
1 teaspoon garlic powder
1 teaspoon onion powder
½ teaspoon paprika
Salt and black pepper to taste
2 tablespoons chopped parsley or cilantro (optional)
Oil for frying
Instructions
Step 1: Prepare the Filling
In a mixing bowl, combine the shredded chicken, cheese, garlic powder, onion powder, paprika, salt, and black pepper. Mix until well combined. Add chopped parsley or cilantro if using.
Step 2: Soften the Tortillas
Warm the tortillas briefly in a skillet or microwave until flexible. This prevents cracking while rolling.
Step 3: Assemble the Taquitos
Place a small amount of filling along one edge of each tortilla. Roll tightly into a cylinder and place seam-side down to keep them sealed.
Step 4: Fry Until Crispy
Heat oil in a deep skillet over medium heat. Once hot, carefully add the taquitos seam-side down. Fry in batches, turning occasionally, until golden brown and crispy on all sides, about 3–4 minutes per batch.
Step 5: Drain and Rest
Remove taquitos from the oil and place on a paper towel-lined tray to drain excess oil. Let rest for 2 minutes before serving.
Variations
Substitute chicken with seasoned ground beef or shredded beef. Use a cheese-only filling for a vegetarian version. Add jalapeños or hot sauce for a spicy kick. You can also bake or air-fry them for a lighter version.
Tips for Best Results
Roll the tortillas tightly to prevent oil from entering the filling. Do not overcrowd the pan while frying. Maintain steady oil temperature to ensure even browning. Serve immediately for maximum crispness.
Storage Tips
Store leftovers in an airtight container in the refrigerator for up to 3 days. Reheat in the oven or air fryer to restore crispiness. Avoid microwaving if possible.
Serving Suggestions
Serve with sour cream, guacamole, salsa, queso dip, or pico de gallo. Pair with a fresh salad or Mexican-style rice for a complete meal.
FAQs
Can I make these ahead of time
Yes, assemble them in advance and refrigerate until ready to fry.
Can they be baked instead of fried
Yes, brush lightly with oil and bake at 400°F (200°C) for 18–22 minutes, turning once.
What tortillas work best
Corn tortillas give the most authentic crunch, while flour tortillas are easier to roll.
Conclusion
These crispy golden taquitos are everything a comfort snack should be. Crunchy, cheesy, and endlessly customizable, they’re perfect for sharing or enjoying all to yourself. Once you master this method, you’ll find yourself making them again and again.